


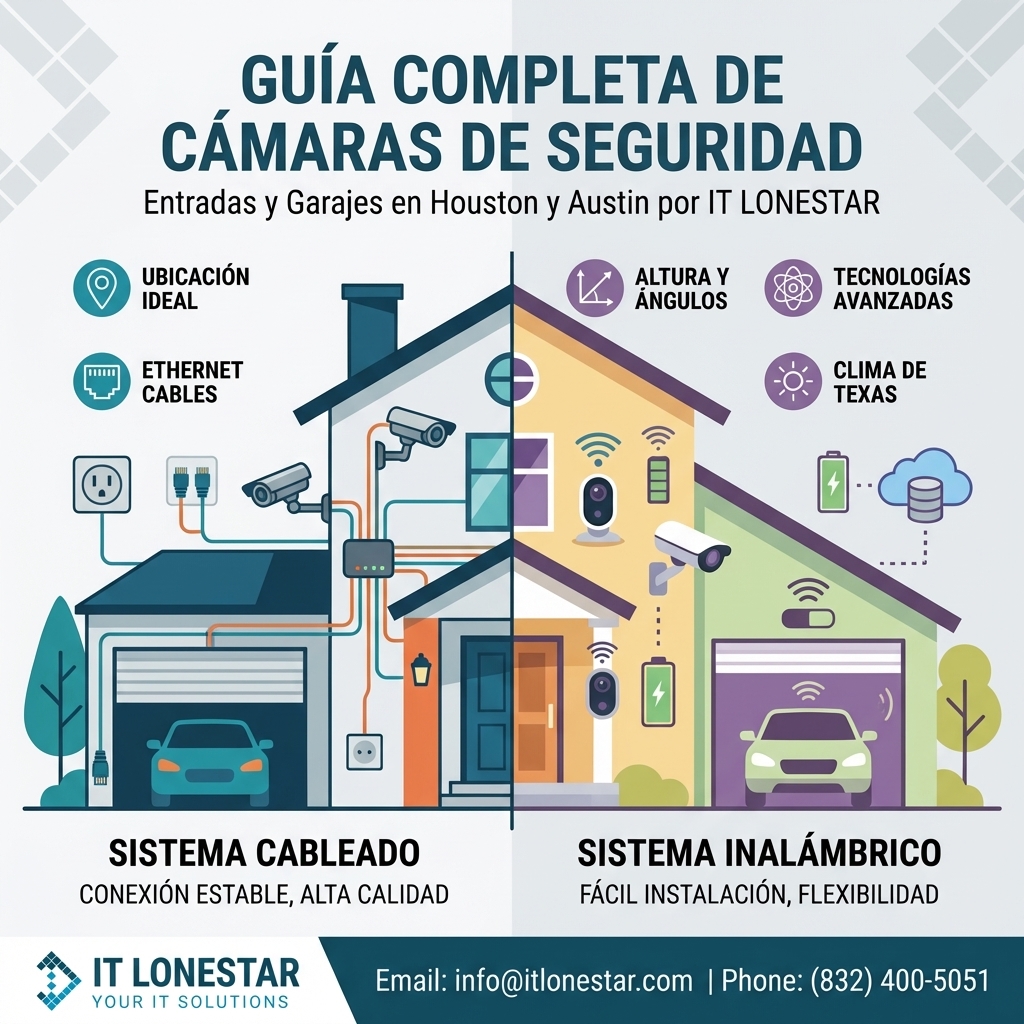
An in‑depth guide from IT LONESTAR on how and where to place security cameras at entrances and garages for homes and businesses in Houston and Austin. It explains ideal camera locations, heights, angles, and technologies to maximize coverage, deter crime, and capture usable evidence in Texas’ specific climate and lighting conditions.
Many homeowners and business owners in Houston and Austin install cameras but still miss critical footage: faces are not clear, license plates are unreadable, or incidents occur just outside the field of view. This usually happens because cameras are placed for convenience (where there’s an outlet or an existing bracket) instead of being strategically positioned based on security principles, local crime patterns, and environmental factors like intense sun, heat, rain, and night lighting.
Common problems IT LONESTAR encounters on site visits in Austin and Houston include:
1) **Wrong mounting height**
– Cameras installed too high only capture the tops of heads or cars.
– Cameras mounted too low are easy to tamper with or vandalize.
2) **Bad viewing angles**
– Cameras pointing directly at the sun or bright headlights, causing glare and washed-out images.
– Entrances or garage doors only partially visible, leaving blind spots where people can stand unseen.
3) **Over‑reliance on a single camera**
– Trying to cover driveway, garage door, front door, and yard with one wide‑angle camera.
– Result: poor detail, stretched images, and no clear facial or plate recognition.
4) **Ignoring Houston & Austin specific conditions**
– High humidity, heat, and severe storms damaging low‑quality or indoor‑rated cameras.
– Strong sunlight and rapid light changes from storms or passing clouds confusing cheap sensors and motion detection.
5) **Weak networking and storage planning**
– Wi‑Fi cameras placed at the edge of signal range lead to freezing video or missing clips.
– No centralized NVR or cloud plan; footage is overwritten just when it is needed.
IT LONESTAR created this entrance and garage placement guide to reduce these issues, standardize best practices for Texas properties, and help Houston and Austin customers get professional‑grade results instead of trial‑and‑error installs.
Below is IT LONESTAR’s expert, field‑tested approach for placing entrance and garage security cameras in Houston and Austin. This combines physical placement, camera selection, and network design, all tailored to local climate and crime realities.
—
## 1. Core Principles IT LONESTAR Uses for Camera Placement
1) **Capture faces and plates, not just shapes**
– Primary goals for entrance and garage cameras: clear facial recognition near doors and usable license plate shots at driveways.
– We prioritize angles that show full faces as people approach, not only overhead views.
2) **Layered coverage instead of one “super camera”**
– Multiple strategically placed 4K or high‑definition cameras beat one ultra‑wide camera that sees everything but captures nothing clearly.
– For most Houston & Austin properties we design **3 zones**: approach (street/driveway), threshold (door/garage opening), and perimeter (side entries).
3) **Design for day, night, and Texas weather**
– We specify IP‑rated outdoor cameras with metal housings, strong IR/low‑light capabilities, and WDR (wide dynamic range) to handle strong sun and deep shadows.
– All mounting hardware and seals are chosen to withstand Gulf humidity, wind‑driven rain, and Austin’s temperature swings.
4) **Angle against light, not into it**
– Whenever possible, we avoid pointing cameras directly east or west to reduce sunrise/sunset glare.
– We use WDR and sometimes small angle shifts or hoods to avoid car headlight blowout in driveways.
5) **Plan with networking and storage in mind**
– We prefer hard‑wired IP cameras with PoE (Power over Ethernet) connected to an NVR for reliability.
– For Wi‑Fi, we validate signal strength at each proposed camera location and add outdoor access points if needed.
—
## 2. Best Camera Placement for Front Entrances
### 2.1 Main Front Door – Primary Identification Camera
**Goal:** Capture a clear, front‑facing image of every person who approaches or rings the bell.
**IT LONESTAR recommendations for Houston & Austin:**
– **Position:**
– Mount the main door camera slightly off to the side of the door (left or right), angled toward the visitor’s face.
– Avoid directly above the doorframe looking straight down.
– **Height:**
– Optimal center lens height: **7–9 feet (2.1–2.7 m)**.
– Low enough for facial detail, high enough to reduce tampering.
– **Field of view:**
– Cover the **entire doorway**, porch area, and path where visitors stand.
– Avoid excessive wide‑angle distortion that makes faces tiny.
– **Doorbell integration:**
– We often pair a **smart video doorbell** (close‑up view, 2‑way audio) with a **fixed 4K camera** on the porch for a broader security view and redundancy.
– Both integrate with IT LONESTAR’s NVR/cloud solutions for unified viewing.
– **Lighting:**
– We check for porch lights and recommend **motion‑activated LED lighting** to enhance camera image quality at night.
– Cameras with built‑in IR help in low‑light, but some visible light significantly improves color and detail.
### 2.2 Side and Back Doors
**Goal:** Eliminate hidden approaches and cover common break‑in points.
– **Placement:**
– Mount cameras to view each secondary entrance from an angle that shows faces as people approach from the yard or side path.
– For Austin homes with fenced yards, we position cameras to see the **gate + door** in a single frame.
– **Height & tamper protection:**
– Similar 7–9 feet height, with vandal‑resistant housings where intruders could reach.
– For tight alleyways in Houston, we may go slightly higher and use a steeper angle plus WDR to handle contrasting light.
– **Smart analytics:**
– We configure line‑crossing, intrusion zones, and human detection to minimize alerts from trees, pets, and heavy rain—important during Gulf Coast storms.
—
## 3. Best Camera Placement for Garages and Driveways
### 3.1 Over the Garage Door – Activity Overview Camera
**Goal:** Provide a wide overview of the driveway, vehicles, and garage entry for context.
– **Placement:**
– Centered or slightly off‑center above the garage door.
– Angled down to see the driveway, garage door threshold, and any side walkway.
– **Height:**
– Typically **9–12 feet (2.7–3.6 m)** depending on garage height.
– High enough to reduce vandalism but not so high that people become indistinguishable.
– **When to use a turret vs. bullet camera:**
– **Turret domes**: better for reducing glare and water spots in heavy rain, excellent for Houston humidity.
– **Bullet cameras**: preferred when we need a tighter angle down a long driveway or alley to the street.
### 3.2 Dedicated License Plate / Driveway Camera
**Goal:** Capture readable license plates and identify vehicles entering or leaving, day and night.
– **Location:**
– Placed lower than the overview camera, often at the side of the driveway pointing across the path of vehicles.
– We avoid head‑on plate shots when possible (harder at night due to headlights).
– **Height & angle:**
– Typically **4–8 feet (1.2–2.4 m)** depending on fencing and landscaping.
– Angled at **15–30 degrees** off the center of travel for optimal night‑time plate capture.
– **Camera type:**
– Where needed, we deploy **LPR‑optimized cameras** (License Plate Recognition) tuned for Texas plates, with built‑in IR and shutter control.
– This is especially valuable for businesses, multi‑family properties, or homes close to busy Houston or Austin streets.
### 3.3 Inside the Garage – Asset Protection Camera
**Goal:** Protect tools, vehicles, and storage items; verify activity when the garage door is open.
– **Placement:**
– One camera at the **back corner** of the garage, angled to see the entire interior and the door opening.
– For 3‑car garages, we often recommend **two interior cameras** for full coverage.
– **Lighting:**
– We account for strong backlight when the door is open by using **WDR‑equipped cameras** and sometimes adding interior LED strips.
– **Privacy controls:**
– IT LONESTAR can set schedules and privacy masking to avoid unnecessary recording when you’re working in the garage, while retaining motion‑event recording when the property should be empty.
—
## 4. Avoiding Blind Spots & Common Mistakes in Houston & Austin Installs
IT LONESTAR’s site surveys focus on eliminating the blind spots and errors that DIY installs usually create.
1) **Not covering approach paths**
– We ensure that the path from the street or alley to the front door/garage is captured by at least one camera at all times.
2) **Ignoring gates and side access**
– Side gates, alleyways, and shared driveways are high‑risk in both cities.
– We often add a small, focused camera above the gate or set on the side wall to see all ingress/egress.
3) **Not planning for landscaping growth**
– In Houston’s climate, plants grow quickly and can block views.
– We select mounting points that remain effective even as shrubs and trees fill in, and we advise on trimming zones.
4) **Mounting only to flimsy surfaces**
– We prefer solid brick, stone, or properly anchored mounts.
– For Austin’s modern builds with stucco or metal, IT LONESTAR uses dedicated mounting plates and weatherproof gaskets.
5) **Neglecting cyber‑security of cameras**
– Poorly secured cloud cameras can be hacked.
– IT LONESTAR configures **unique passwords, VLANs, VPN access, and firmware updates** so your physical security doesn’t become a digital risk.
—
## 5. Network, Power, and Recording: How IT LONESTAR Designs Reliable Systems
Proper placement only works when the underlying infrastructure is solid. In Austin and Houston we see many systems fail because they rely on weak Wi‑Fi and consumer‑grade storage.
### 5.1 Power & Connectivity
– **PoE wiring:**
– We strongly recommend **PoE (Power over Ethernet)** where feasible: one cable for power and data, stable even during storms.
– IT LONESTAR runs CAT6 or better cabling from a central network closet or structured media panel.
– **Redundant power:**
– NVRs and network switches are typically placed on a **UPS (battery backup)** to ride through short outages and protect data.
– **Wi‑Fi optimization (when wiring isn’t possible):**
– We measure signal strength at each camera location and install **outdoor access points** when needed.
– We separate camera Wi‑Fi from guest networks to keep performance consistent.
### 5.2 Recording and Remote Access
– **Central NVR or hybrid cloud:**
– IT LONESTAR deploys NVRs sized to your camera count and retention needs (e.g., 2–4 weeks of footage).
– For multi‑site or remote property owners, we add secure cloud or off‑site backups.
– **Secure remote viewing:**
– Access via encrypted apps or VPN, not open ports that expose your system to the internet.
– Role‑based permissions for employees or family members.
– **Alert tuning:**
– We configure smart alerts (people, vehicles, schedules) to avoid “alert fatigue,” especially for busy streets in central Austin or dense Houston neighborhoods.
—
## 6. Residential vs. Commercial: How Placement Strategy Changes
### 6.1 Residential Homes in Houston & Austin
– Focus on **front door, garage, driveway, and back door** as the primary risk points.
– Emphasis on **discreet but visible** cameras that act as a deterrent without disturbing the home’s look.
– Integration with **smart home systems** (door locks, lights, alarms) managed or supported by IT LONESTAR.
### 6.2 Small Businesses and Offices
– Additional cameras for **employee entrances, loading areas, and parking lots**.
– Closer attention to **license plates** and **time‑stamped evidence** to support incident investigations.
– Compliance with internal policies and, when applicable, insurance requirements.
### 6.3 Multi‑Family & HOAs
– Shared entrances, community garages, and gates receive **higher‑density camera coverage**.
– IT LONESTAR often designs **centralized monitoring** and admin dashboards for property managers.
– Special consideration for privacy zones (windows, neighboring properties) to meet legal and HOA rules.
—
## 7. How IT LONESTAR Helps You Get It Right in Austin & Houston
IT LONESTAR offers end‑to‑end design and deployment for entrance and garage camera systems across the Austin and Houston metro areas:
1) **On‑site or virtual security assessment**
– We review entrances, garages, driveways, side access, lighting, and existing infrastructure.
– We map ideal camera positions and heights tailored to your building layout.
2) **Custom system design**
– Camera model selection (resolution, low‑light performance, analytics).
– PoE and Wi‑Fi layout, NVR sizing, and storage retention planning.
3) **Professional installation**
– Clean cabling, weather‑proof terminations, and sturdy mounts rated for Texas conditions.
– Correct aiming, focus, and configuration of each camera according to the plan.
4) **Configuration, training, and ongoing support**
– Motion zones, alerts, remote access apps, and user training.
– Monitoring, firmware updates, and rapid support if a camera or NVR goes offline.
If you’re in **Houston or Austin** and want your entrance and garage cameras placed for maximum security—not just convenience—IT LONESTAR can design, install, and maintain a solution tailored to your property and risk profile.
—
## 8. Next Steps
– **Schedule a site survey with IT LONESTAR in Austin or Houston.**
– Share your priorities: deterrence, evidence collection, remote monitoring, or all three.
– We’ll propose a clear layout showing exactly where each entrance and garage camera should go, how it will be powered, and how you’ll access the footage securely.
A few well‑placed, professionally configured cameras will do more to protect your entrances and garages than a large number of poorly installed devices. IT LONESTAR’s local expertise in both Houston and Austin ensures your system is built right the first time, and ready for Texas weather and real‑world security threats.